


We learned about the pods in the previous blog of the series. In the production environment creating a single pod is not enough or creating multiple/thousands of pods is not possible. To make the replicas with the same pod configuration Replicasets and Deployments are used.
Replica Sets:
Let's talk about Replicasets first. using replica sets we have control over how many pods should be running. replica set gives the functionality of scaling up and scaling down the pods. If we specified a particular number of replicas in the manifest file then ReplicaSet will always make sure, that number of pods are running. if one pod get deleted for some reason, Replicaset will create another one.
How to write a Replicaset Manifest file?
---
 kind: ReplicaSet
 apiVersion: apps/v1
 metadata:
   name: rs1
 spec:
   replicas: 3
   selector:
     matchLabels:
        env: production
   template:
     metadata:
        name: rspod
        labels:
          env: production
     spec:
       containers:
         - name: rscontainer
           image: httpd
           ports:
           - containerPort: 80
Create a Replica set using apply command and check if it created successfully or not.
$ kubectl apply -f <FileName>

$ kubectl get rs

Run "kubectl get pods" to check pods.

Now let's try to delete one pod and run the get pods command to check if a new pod get created or not. I'm deleting the third one.
$ kubectl delete pod rs1-lnbs2

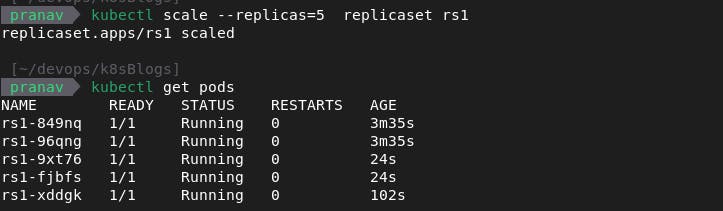
The best feature of the replica set is the scaling up and down of the pods. currently, we have 3 replicas, let's scale up to 5.
$ kubectl scale --replicas=5 replicaset rs1
For scaling down the same command is used just the replicas are changed to a smaller number. let's scale down to just one pod.

Deployments:
Deployments are just one extra layer over replica sets. deployments provide all the functionalities as replica sets like scaling up and down, always having a particular number of pods. besides these functionalities using deployments, we can roll back to the previous versions and roll out to the next version also.
If any problem occurs in deployments, Kubernetes will automatically roll back to the previous version.
Deployment Manifest File.
---
 kind: Deployment
 apiVersion: apps/v1
 metadata:
   name: mydeploy
 spec:
   replicas: 2
   selector:
     matchLabels:
       env: development
    template:
      metadata:
        name: deplpod
        labels:
          env: development
      spec:
        containers:
        - name: dcontainer
          image: httpd
          ports:
          - containerPort: 80
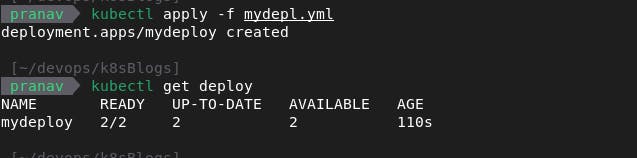
$ kubectl apply -f <file-name>

$ kubectl get deploy
Now let's scale up the number of pods.
$ kubectl scale --replicas=4 deploy <deployment-name>

Update and Roll Back:
Make some changes in the manifest and again apply, this will create a newer version of deployment.
let's change the image from httpd to Nginx and apply changes.
Now run the describe command to check which image is running now.
$ kubectl describe deployment <deployment-name>
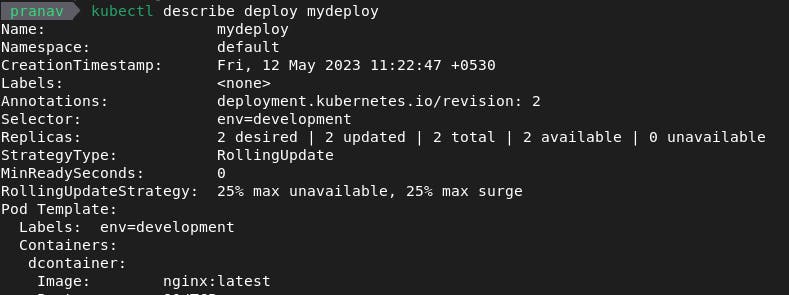
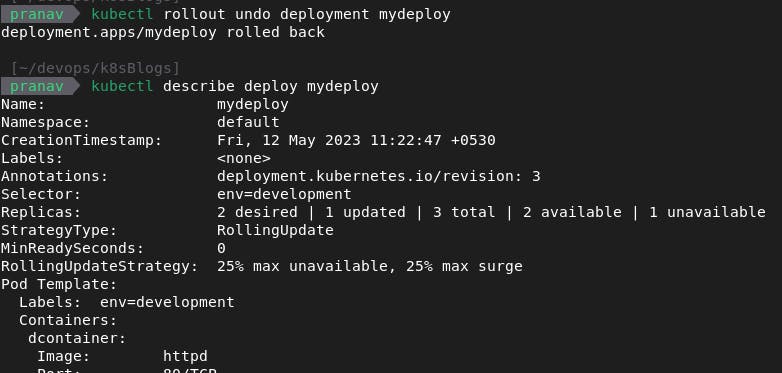
As you can see in the above manifest file our previous deployment versions image was httpd. so let's roll back and check if can we go back to the previous version.
$ kubectl rollout undo deployment <deployment-name>
To see how many revisions we made
$ kubectl rollout history deployment mydeploy
To roll back, forth and to a particular revision use the following command and check how rolling happens.
$ kubectl rollout undo deployment <deployment-name> --to-revision=<revision-number>
Here I'm rolling from revision 5 to 4 and vice-versa


NOTE:
In Deployment, if we are on the newer version and we scale up the pods [let's say from 2 to 4] and then rolled back to the previous version then the number of pods will not change [ In this case they will be 4 ].
Conclusion:
The article is about how to use replica sets and deployments for creating multiple pods from just one file, how to scale them up and down and how to roll back to previous versions and the next versions.
Thank You!!!